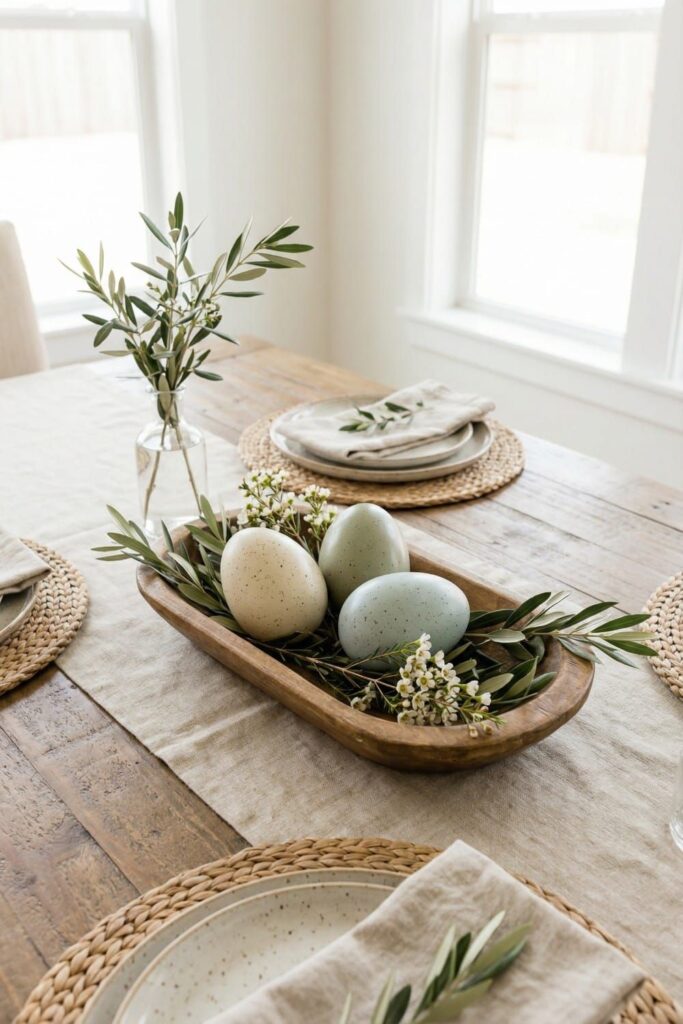
Most Easter decor fails for one measurable reason: too many competing colors. A typical store-bought tablescape runs 6 to 9 saturated hues, and the eye has nowhere to land. Restricting the palette to two families – muted olive green and mottled earth tones (clay, oat, warm grey) – cuts visual noise by roughly 70 percent and makes even cheap materials read as expensive.
Advertisements1
This package covers 13 projects across three categories: olive sprig arrangements, mottled egg and clay forms, and the connective pieces (linens, vessels, candles) that hold the table together. Prep runs 15 minutes for the quickest single project, 35 minutes for the full set, and every material is either foraged, thrifted, or under $12 at a craft store.
You do not need floral training. You need a palette rule, a scale rule, and a texture rule – which is exactly what the steps below give you.
Why You'll Love This Recipe
About the Ingredients
3 to 4 fresh olive branches, 18 to 24 inches (45 to 60 cm) each
Olive branches give the silvery-green tone that anchors the whole palette. If olive is unavailable or out of season, substitute seeded eucalyptus or Russian olive – both hold the same grey-green cast and dry without dropping leaves.
1 bunch fresh eucalyptus (about 10 stems)
Used as filler between olive sprigs so the arrangement reads full without extra cost. Silver dollar eucalyptus is the best match; baby's breath is a workable substitute if you want a lighter, airier look.
12 to 18 white or cream eggs, blown or hard-boiled
Blown eggs last indefinitely and are lighter for hanging; hard-boiled eggs are faster but must be refrigerated. Buy one extra dozen – cracked shells happen, and a 12-pack runs about $4.
1 package (2 lb / 900 g) air-dry clay, stone or oatmeal color
Air-dry clay forms the mottled earthy objects – egg cups, small bowls, ring dishes. Polymer clay is a substitute but requires oven curing at 275 F (135 C) for 15 minutes per 1/4 inch (6 mm) of thickness.
2 tbsp (30 ml) matte acrylic craft paint, olive green
Used thinned for the mottled wash on eggs and clay. Chalk paint is a good substitute because it grips slick shells without primer.
1 tbsp (15 ml) matte acrylic craft paint, warm terracotta
The second half of the mottled wash. Mix with the olive at roughly 1:1 for the muddy, organic tone that defines this palette.
1 natural sponge or sea sponge, 2 to 3 inches (5 to 8 cm)
A sponge gives the irregular blotching that a brush cannot. A crumpled plastic bag works as a free substitute and produces a slightly larger, softer mottle.
1 roll (10 yd / 9 m) natural linen ribbon, 1 inch (2.5 cm) wide
Ties sprigs to egg cups and wraps napkins. Cotton twill tape is a sturdier substitute and holds a knot better on round surfaces.
6 to 8 small glass or ceramic vessels, 3 to 5 inches (8 to 13 cm) tall
Thrifted bud vases, jars, and cups all work. Keep them matte or frosted – glossy finishes fight the mottled texture and add unwanted shine.
1 bag (about 2 cups / 200 g) natural moss or dried sheet moss
Fills gaps at the base and hides mechanics. Spanish moss is a fine substitute but reads greyer; preserved reindeer moss holds the truer olive tone.
4 to 6 unscented ivory taper candles, 8 to 10 inches (20 to 25 cm)
Candlelight warms the cool green tones. Beeswax tapers are a better substitute – they burn slower and their honey tone sits naturally in an earthy palette.
1 neutral table runner, 14 by 72 inches (36 by 183 cm)
The base layer that keeps everything from floating. Burlap, oatmeal linen, or a plain cotton sheet cut to size all work; avoid anything with print or pattern.
Tips & Tricks
- Do not crowd the vessels. Three to five stems per vase reads intentional; eight reads like a grocery bouquet. Odd numbers photograph better in every case.
- Keep the palette to two color families maximum. The moment you add a pink or a bright yellow, the mottled earth tones start looking muddy instead of deliberate.
- Mottle in thin layers, not one heavy coat. Two or three light passes with a nearly dry sponge give depth; one wet pass gives a flat smear.
- Balance height before you balance color. Place the tallest sprigs first, then fill down – this prevents the top-heavy arrangements that topple during dinner.
Pro Tips
Step-by-Step Instructions
1. Condition the branches
Strip the bottom 3 inches (8 cm) of leaves from all olive and eucalyptus stems and re-cut each at a 45-degree angle with sharp shears. This opens the water channels and typically extends vase life from 4 days to 8 to 12 days.
2. Build the base layer
Lay the linen runner down the center of the table, leaving 12 inches (30 cm) of bare wood at each end. A defined base keeps the arrangement from reading as scattered objects.
3. Mottle the eggs
Mix the olive and terracotta paints 1:1, dab a sponge nearly dry, and blot each egg in two or three light passes. Let them dry 10 minutes between passes – the layering is what creates depth rather than a flat smear.
4. Shape the clay forms
Roll the air-dry clay to 1/4 inch (6 mm) thickness and press it into small bowls or egg-cup shapes. Dry at room temperature for 24 hours, or bake at 200 F (95 C) for 20 minutes to speed the process; the forms are done when the surface is matte and cool to the touch, not tacky.
5. Arrange the olive sprigs
Place the tallest olive branches in the center vessel first, then work outward and downward into the smaller vessels. Keep 3 to 5 stems per container and rotate each vase a quarter turn as you build so it looks good from every seat.
6. Tuck in the moss
Press small clumps of moss around the base of each vessel to hide stems and fill gaps. Keep the moss low and irregular – a perfectly even ring looks artificial.
7. Tie the linen accents
Wrap linen ribbon around each clay form and knot it loosely, leaving 4 to 5 inches (10 to 13 cm) of tail. Trim the tails at an angle for a finished look.
8. Set the candles
Place ivory tapers in the remaining vessels, spacing them at least 6 inches (15 cm) apart so the flames do not crowd. Light them only at the table.
9. Style and check
Step back 6 feet (2 m) and check the silhouette. If any single element dominates, remove it rather than adding something to balance it – subtraction is faster and cleaner than addition.
Delicious Variations
All-White Mottle
Swap the olive paint for warm grey and use only eucalyptus, giving a clean winter-to-spring transition palette.
Terracotta Only
Drop the green entirely and lean into clay and rust tones with dried orange slices for a warmer, more Mediterranean table.
Foraged Minimal
Replace all purchased stems with whatever is local – rosemary, bay, or boxwood – and keep the clay forms unpainted for a raw, natural finish.
How to Store 13 Elegant Easter Decor Ideas – Olive Sprigs and Mottled Earthy Forms
Refrigerator
Do not refrigerate the decor. Fresh olive and eucalyptus stems keep best in a cool room at 65 to 70 F (18 to 21 C); cold storage blackens the leaves within 48 hours.
Freezer
Not recommended for fresh branches or painted eggs. Unpainted air-dry clay forms can be wrapped and frozen, but there is no benefit – they store perfectly at room temperature.
Reheating
Not applicable. For next-year reuse, store clay forms and vessels wrapped in tissue in a dry box, and refresh the arrangement with new foraged stems each spring.
Frequently Asked Questions
Q: How long do olive branches last in a vase?
Fresh olive branches typically last 8 to 12 days indoors when the stems are cut at a 45-degree angle and the water is changed every two days. Keeping them out of direct sun and away from heating vents adds several more days.
Q: Can I use hard-boiled eggs instead of blown eggs for Easter decor?
Yes, but hard-boiled eggs must stay refrigerated and should not sit out longer than two hours at room temperature. Blown eggs are hollow, last indefinitely, and are the better choice if you want to reuse the decor next year.
Q: How do I get a mottled finish instead of a flat painted look?
Use a nearly dry sponge and apply two or three thin passes rather than one heavy coat, letting each pass dry about 10 minutes. Layering semi-transparent paint is what creates the organic blotching; a wet sponge produces an even, flat smear.
Q: Does air-dry clay need to be baked?
No, air-dry clay cures at room temperature in about 24 hours for a 1/4 inch (6 mm) thickness. You can speed it up by baking at 200 F (95 C) for 20 minutes, which also reduces surface cracking.
Q: What is the cheapest way to build this Easter table?
Forage the olive or eucalyptus stems, thrift the vessels, and make the clay forms yourself – that combination brings the total under $20. The two paint colors and the clay are the only items worth buying new.
Pick two colors, gather your stems, and build the table in one sitting. Start with the tallest branch and work down, and resist the urge to add a third hue. Keep it simple, keep it growing.
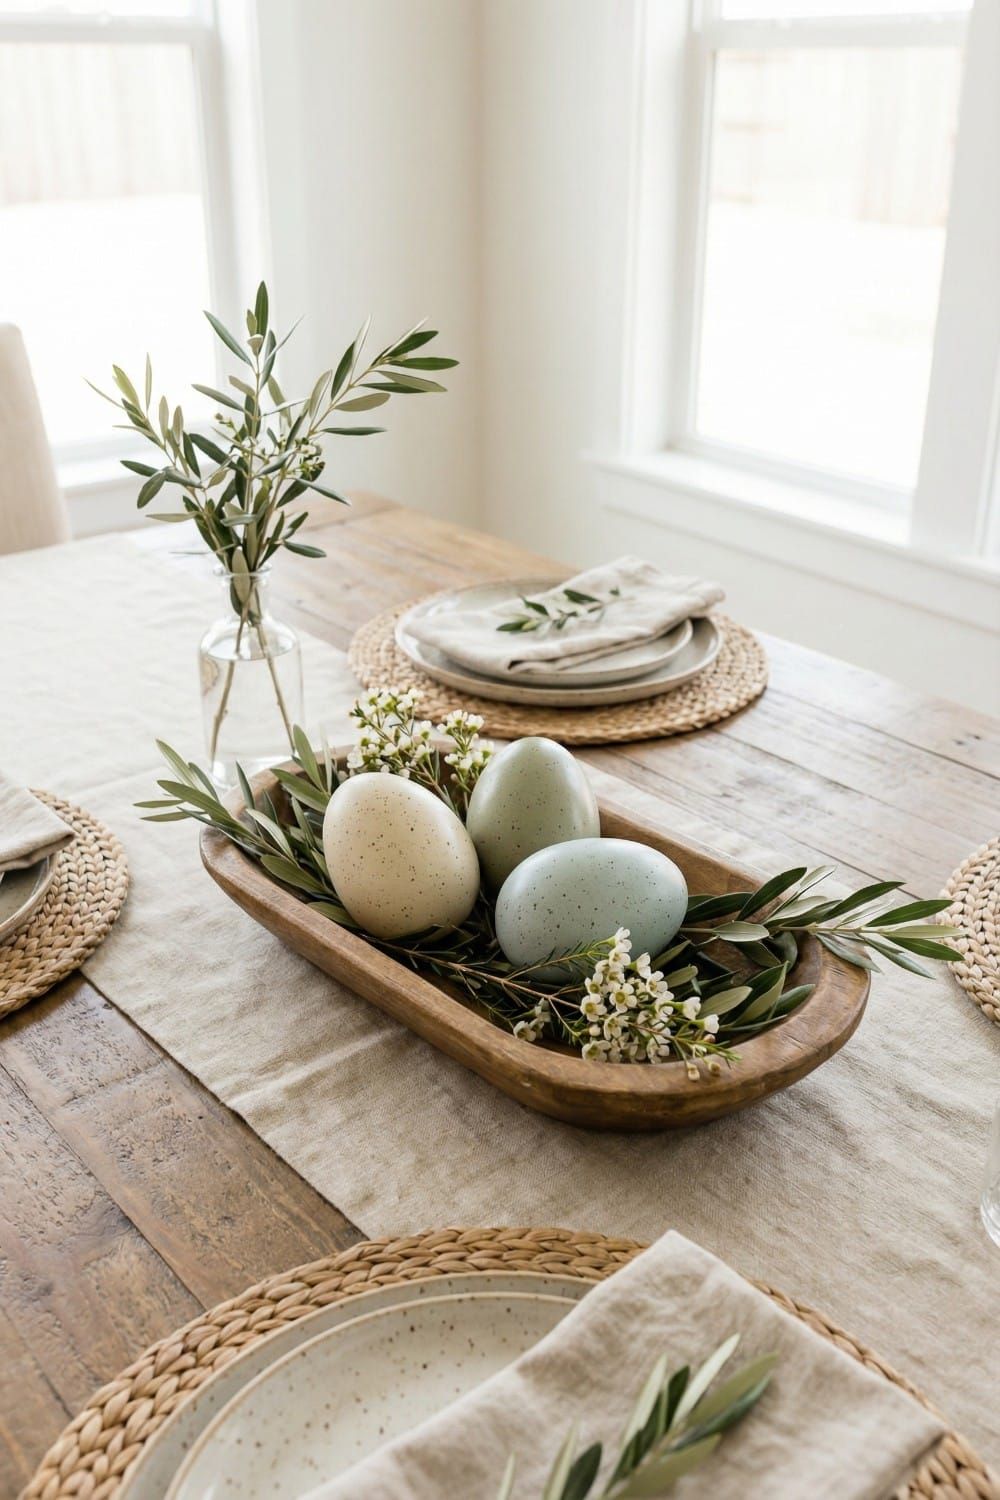
13 Elegant Easter Decor Ideas – Olive Sprigs and Mottled Earthy Forms
Elegant Easter decor ideas using olive sprigs and mottled earthy forms: 13 budget-friendly projects that turn plain eggs and clay into a designer table.
🧂 Ingredients
- 3 to 4 fresh olive branches, 18 to 24 inches (45 to 60 cm) each
- 1 bunch fresh eucalyptus (about 10 stems)
- 12 to 18 white or cream eggs, blown or hard-boiled
- 1 package (2 lb / 900 g) air-dry clay, stone or oatmeal color
- 2 tbsp (30 ml) matte acrylic craft paint, olive green
- 1 tbsp (15 ml) matte acrylic craft paint, warm terracotta
- 1 natural sponge or sea sponge, 2 to 3 inches (5 to 8 cm)
- 1 roll (10 yd / 9 m) natural linen ribbon, 1 inch (2.5 cm) wide
- 6 to 8 small glass or ceramic vessels, 3 to 5 inches (8 to 13 cm) tall
- 1 bag (about 2 cups / 200 g) natural moss or dried sheet moss
- 4 to 6 unscented ivory taper candles, 8 to 10 inches (20 to 25 cm)
- 1 neutral table runner, 14 by 72 inches (36 by 183 cm)
📋 Instructions
- 1Condition the branches — Strip the bottom 3 inches (8 cm) of leaves from all olive and eucalyptus stems and re-cut each at a 45-degree angle with sharp shears. This opens the water channels and typically extends vase life from 4 days to 8 to 12 days.
- 2Build the base layer — Lay the linen runner down the center of the table, leaving 12 inches (30 cm) of bare wood at each end. A defined base keeps the arrangement from reading as scattered objects.
- 3Mottle the eggs — Mix the olive and terracotta paints 1:1, dab a sponge nearly dry, and blot each egg in two or three light passes. Let them dry 10 minutes between passes – the layering is what creates depth rather than a flat smear.
- 4Shape the clay forms — Roll the air-dry clay to 1/4 inch (6 mm) thickness and press it into small bowls or egg-cup shapes. Dry at room temperature for 24 hours, or bake at 200 F (95 C) for 20 minutes to speed the process; the forms are done when the surface is matte and cool to the touch, not tacky.
- 5Arrange the olive sprigs — Place the tallest olive branches in the center vessel first, then work outward and downward into the smaller vessels. Keep 3 to 5 stems per container and rotate each vase a quarter turn as you build so it looks good from every seat.
- 6Tuck in the moss — Press small clumps of moss around the base of each vessel to hide stems and fill gaps. Keep the moss low and irregular – a perfectly even ring looks artificial.
- 7Tie the linen accents — Wrap linen ribbon around each clay form and knot it loosely, leaving 4 to 5 inches (10 to 13 cm) of tail. Trim the tails at an angle for a finished look.
- 8Set the candles — Place ivory tapers in the remaining vessels, spacing them at least 6 inches (15 cm) apart so the flames do not crowd. Light them only at the table.
- 9Style and check — Step back 6 feet (2 m) and check the silhouette. If any single element dominates, remove it rather than adding something to balance it – subtraction is faster and cleaner than addition.

Liam covers personal finance and investing for beginners, demystifying money management with clear, no-nonsense advice. He focuses on budgeting, saving, and long-term wealth building, often using real-life scenarios to illustrate concepts.