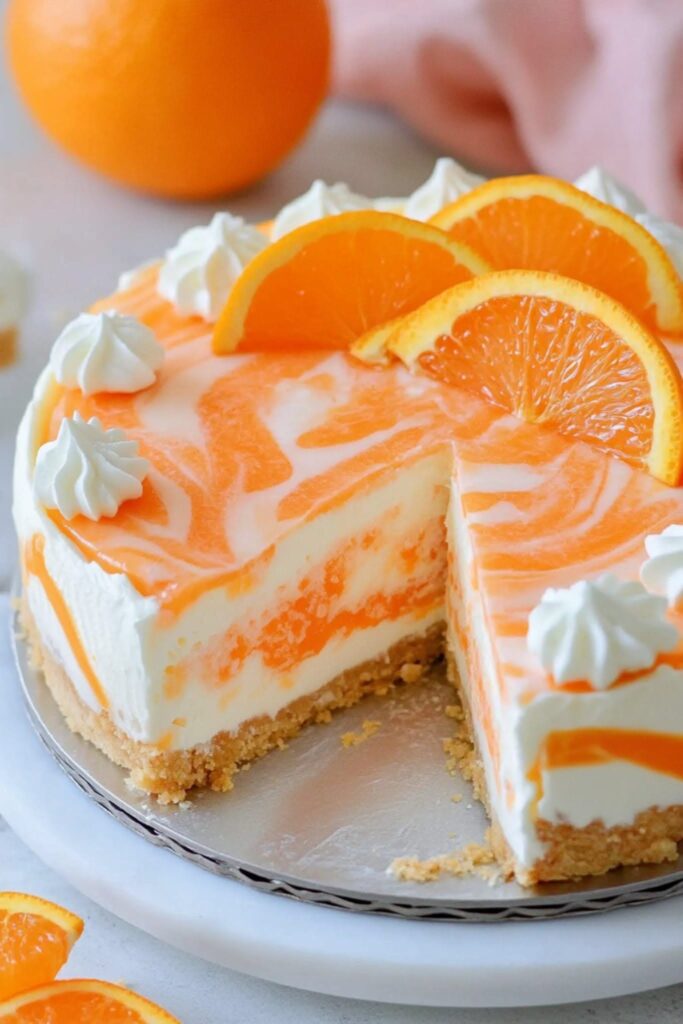
When I was a kid, the best part of summer was chasing down the ice cream truck for a Creamsicle. That bright, orangey pop of citrus wrapped in creamy vanilla was pure joy. Now, I've turned that nostalgic treat into an elegant, no-bake cheesecake that's perfect for warm days when you don't want to turn on the oven.
Advertisements1
This cheesecake is incredibly smooth and luscious, with a sunny orange flavor that's balanced by a buttery graham cracker crust. It sets up beautifully in the fridge, so you can make it ahead for parties, picnics, or just a little self-care treat. Plus, it's so easy that even beginner bakers will feel like pros.
I love how the orange zest and juice brighten up the cream cheese filling, making every bite taste like a creamsicle but with a sophisticated twist. And because it's no-bake, you can whip it up in about 20 minutes of active time. Let's dive in!
Why You'll Love This Recipe
About the Ingredients
1 1/2 cups (150g) graham cracker crumbs
You can use store-bought crumbs or crush about 10 full graham crackers. For a gluten-free version, use gluten-free graham crackers or crushed gluten-free cookies.
1/4 cup (50g) granulated sugar
Adds sweetness to the crust. You can substitute with coconut sugar or a sugar-free sweetener for a lower-sugar option.
6 tablespoons (85g) unsalted butter, melted
Use salted butter if you prefer a salty-sweet contrast; just reduce the added salt in the filling. Melt the butter gently to avoid burning.
16 oz (450g) cream cheese, softened
Full-fat cream cheese gives the best texture. For a lighter version, use reduced-fat, but the cheesecake will be slightly less creamy. Make sure it's at room temperature to avoid lumps.
1 cup (200g) granulated sugar
Adjust to your sweetness preference. You can use honey or maple syrup, but note that they may alter the flavor and set.
1 cup (240ml) heavy whipping cream
Whipped to stiff peaks for a light, airy filling. If you prefer a denser cheesecake, use 1/2 cup heavy cream and 1/2 cup sour cream.
1/2 cup (120ml) freshly squeezed orange juice (about 2-3 oranges)
Use fresh juice for the best flavor. Bottled juice tends to be more acidic and less sweet. For extra orange punch, add 1 tablespoon of orange zest.
2 tablespoons orange zest (from about 2 oranges)
Zest the oranges before juicing them. Avoid the white pith, which is bitter. If you don't have fresh oranges, you can use 1 teaspoon of orange extract.
1 teaspoon vanilla extract
Pure vanilla extract adds depth. You can use imitation vanilla or omit it for a cleaner orange flavor.
1/4 teaspoon salt
Balances the sweetness and enhances the orange flavor. Use fine sea salt for even distribution.
Optional: 1/2 cup (120ml) orange marmalade or orange slices for garnish
Adds a pretty finishing touch and extra orange flavor. You can also use fresh orange slices or candied orange peel.
Tips & Tricks
Soften the cream cheese completely
If it's cold, you'll end up with lumps. Leave it on the counter for at least 30 minutes, or microwave in 10-second bursts until soft.
Whip the cream to stiff peaks
Under-whipped cream will make the filling runny. The peaks should stand straight up when you lift the whisk.
Use a springform pan for easy release
Line the bottom with parchment paper for extra insurance. Run a hot knife around the edge before releasing.
Pro Tips
Step-by-Step Instructions
1. Prepare the Crust
In a medium bowl, combine graham cracker crumbs, 1/4 cup sugar, and melted butter. Press firmly into the bottom of a 9-inch springform pan. Use the bottom of a measuring cup to compact it evenly. Place in the freezer while you make the filling.
2. Beat the Cream Cheese
In a large bowl, beat the softened cream cheese with 1 cup sugar, vanilla, and salt until smooth and creamy, about 2 minutes. Make sure there are no lumps. Scrape down the sides as needed.
3. Add Orange Flavor
Mix in the orange juice and zest until fully incorporated. The mixture may look slightly curdled, but that's okay – it will smooth out when you add the cream.
4. Whip the Cream
In a separate chilled bowl, beat the heavy whipping cream until stiff peaks form. Be careful not to overbeat, or you'll get butter. You should see distinct peaks that hold their shape.
5. Fold in Whipped Cream
Gently fold the whipped cream into the cream cheese mixture using a spatula. Use a folding motion – cut down through the center, scrape along the bottom, and lift up. This keeps the mixture light and airy.
6. Assemble and Chill
Pour the filling over the prepared crust and smooth the top with an offset spatula. Tap the pan gently on the counter to release any air bubbles. Refrigerate for at least 6 hours, preferably overnight, until fully set.
7. Garnish and Serve
Before serving, run a knife around the edge of the pan and release the springform. Top with orange marmalade or fresh orange slices if desired. Slice with a warm knife for clean edges.
Delicious Variations
Chocolate Orange Twist
Add 1/2 cup mini chocolate chips to the filling and drizzle melted chocolate over the top.
Vanilla Bean Creamsicle
Scrape the seeds from one vanilla bean into the cream cheese mixture for a more intense vanilla flavor.
Vegan Option
Use dairy-free cream cheese and coconut cream instead of heavy cream, and a vegan butter substitute for the crust.
How to Store No-bake Orange Creamsicle Cheesecake
Refrigerator
Store in the refrigerator, covered, for up to 5 days. Keep it in the springform pan or an airtight container.
Freezer
Wrap the cheesecake (without garnish) tightly in plastic wrap and foil, then freeze for up to 2 months. Thaw in the refrigerator overnight before serving.
Reheating
No reheating needed – serve cold. If frozen, let it thaw in the fridge for a few hours.
Frequently Asked Questions
Q: Can I use bottled orange juice instead of fresh?
Yes, but fresh orange juice is recommended for the best flavor. Bottled juice often has added preservatives that can affect the taste and texture. If using bottled, choose 100% pure orange juice with no added sugar.
Q: How long does this cheesecake need to set?
This cheesecake needs at least 6 hours in the refrigerator to set firmly. For best results, chill it overnight. If you're in a hurry, you can freeze it for 2-3 hours, but the texture may be slightly icier.
Q: Can I make this without a springform pan?
Absolutely! You can use a regular pie dish or a 9-inch cake pan lined with plastic wrap for easy removal. Just press the crust into the bottom and pour the filling over it. Serve directly from the dish.
Q: Why is my cheesecake filling runny?
A runny filling usually happens if the cream was under-whipped or the cream cheese wasn't softened enough. Make sure the cream is whipped to stiff peaks, and fold gently to keep the air in. Also, ensure the cheesecake chills long enough.
Q: Can I use low-fat cream cheese?
Yes, you can use low-fat cream cheese, but the cheesecake will be less rich and creamy. It may also be slightly softer. To compensate, you can add an extra 1/4 cup of heavy cream and whip it a bit more.
I hope you enjoy this no-bake Orange Creamsicle Cheesecake as much as I do! It's the perfect way to celebrate sunny days. If you try it, let me know in the comments below – I'd love to hear how it turns out. And if you have any questions, just ask. Small steps, big change.
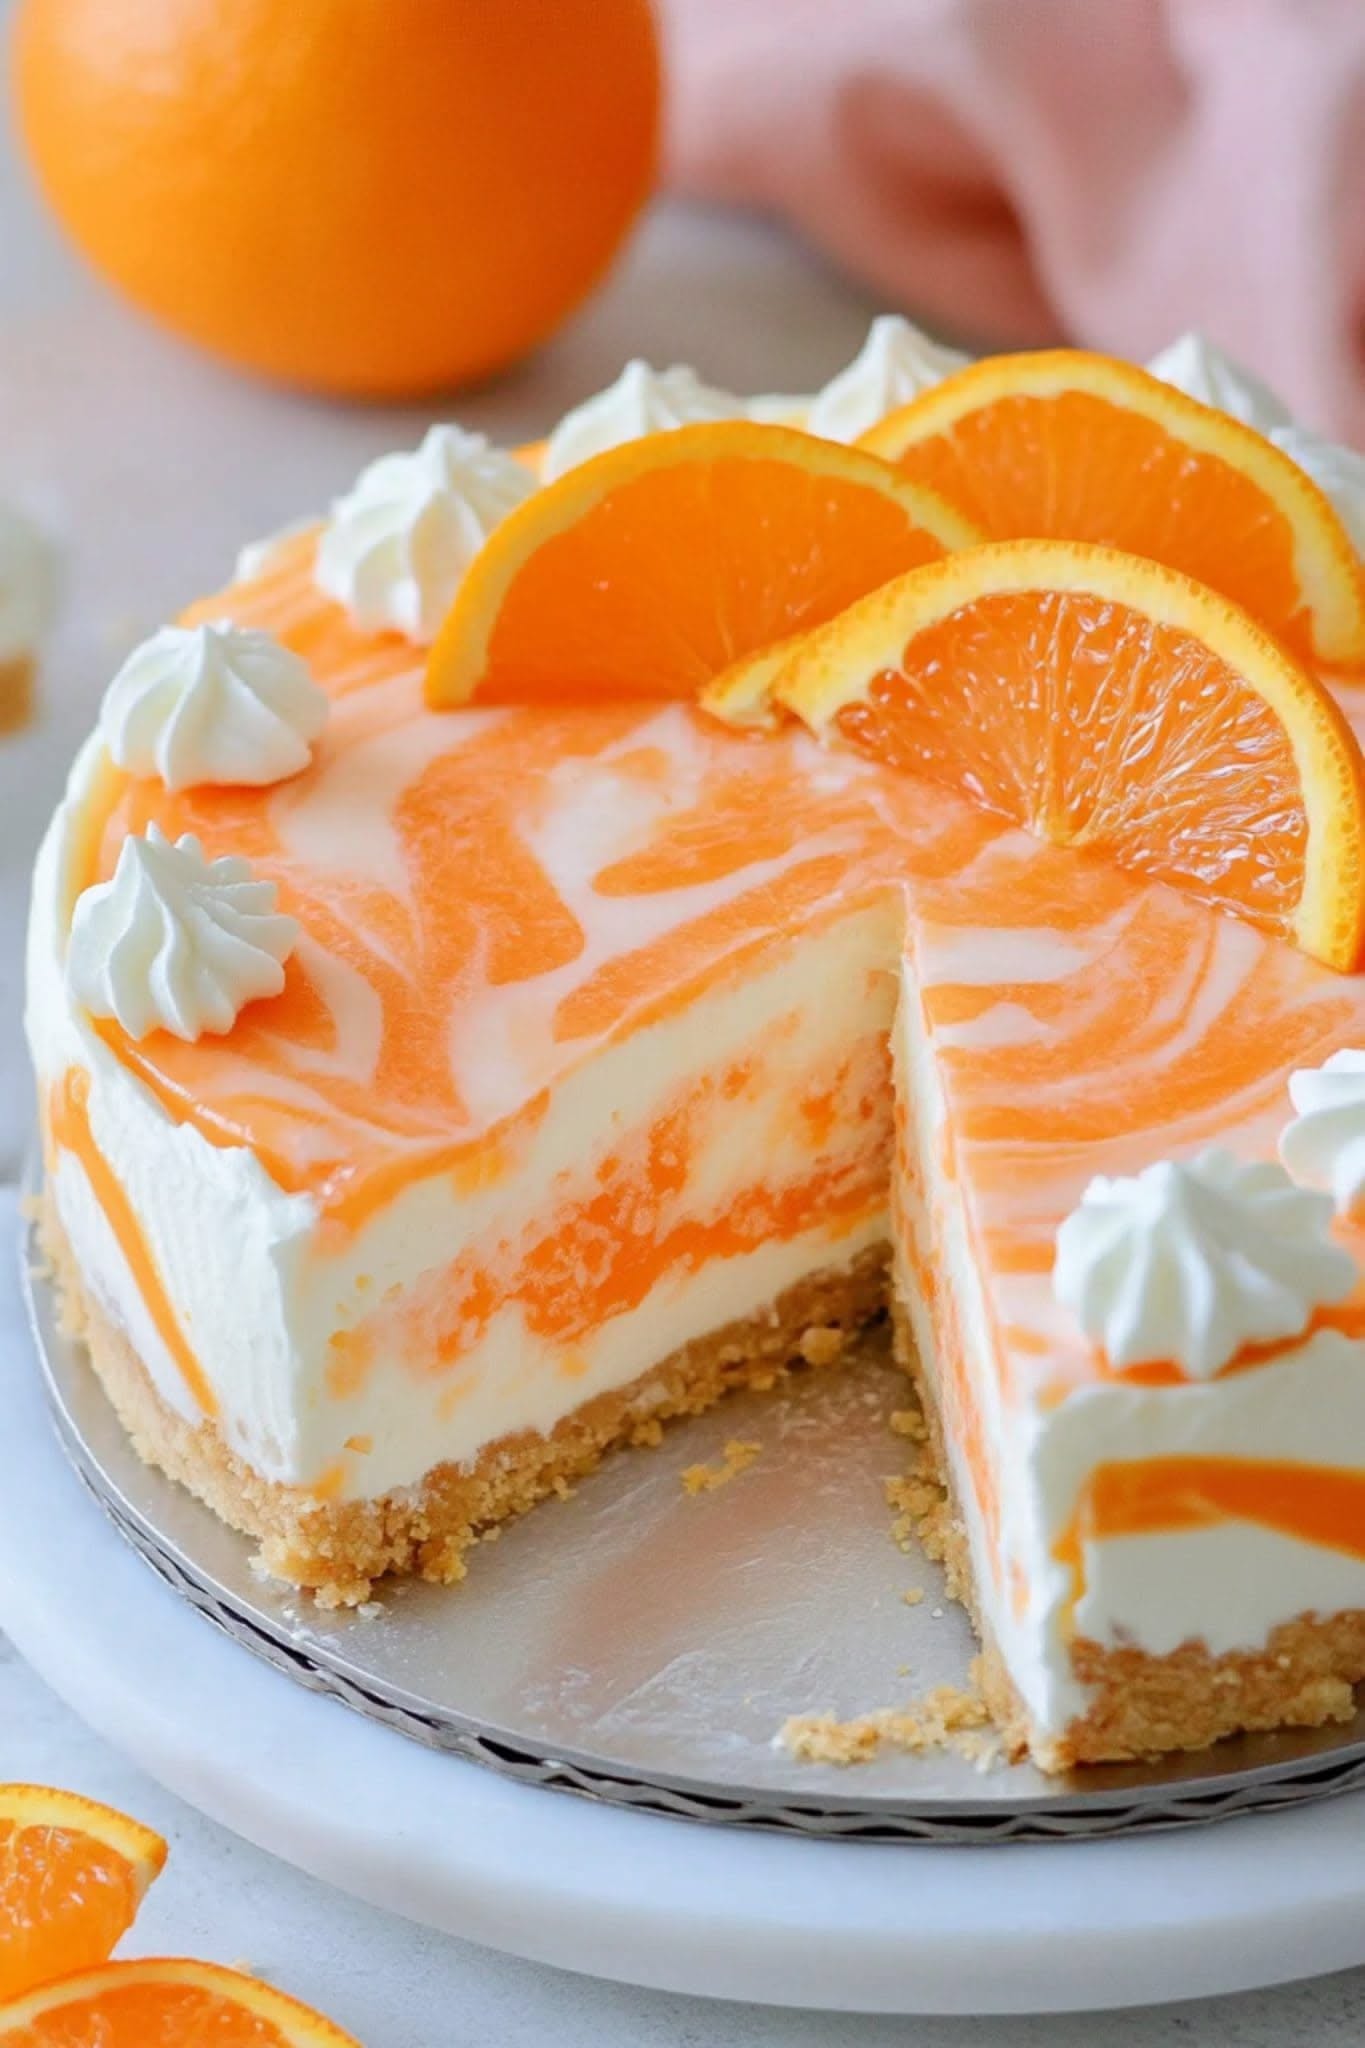
No-bake Orange Creamsicle Cheesecake
No-bake Orange Creamsicle Cheesecake: creamy, citrusy, and refreshing. A simple dessert that tastes like summer!
🧂 Ingredients
- 1 1/2 cups (150g) graham cracker crumbs
- 1/4 cup (50g) granulated sugar
- 6 tablespoons (85g) unsalted butter, melted
- 16 oz (450g) cream cheese, softened
- 1 cup (200g) granulated sugar
- 1 cup (240ml) heavy whipping cream
- 1/2 cup (120ml) freshly squeezed orange juice (about 2-3 oranges)
- 2 tablespoons orange zest (from about 2 oranges)
- 1 teaspoon vanilla extract
- 1/4 teaspoon salt
- Optional: 1/2 cup (120ml) orange marmalade or orange slices for garnish
📋 Instructions
- 1Prepare the Crust — In a medium bowl, combine graham cracker crumbs, 1/4 cup sugar, and melted butter. Press firmly into the bottom of a 9-inch springform pan. Use the bottom of a measuring cup to compact it evenly. Place in the freezer while you make the filling.
- 2Beat the Cream Cheese — In a large bowl, beat the softened cream cheese with 1 cup sugar, vanilla, and salt until smooth and creamy, about 2 minutes. Make sure there are no lumps. Scrape down the sides as needed.
- 3Add Orange Flavor — Mix in the orange juice and zest until fully incorporated. The mixture may look slightly curdled, but that's okay – it will smooth out when you add the cream.
- 4Whip the Cream — In a separate chilled bowl, beat the heavy whipping cream until stiff peaks form. Be careful not to overbeat, or you'll get butter. You should see distinct peaks that hold their shape.
- 5Fold in Whipped Cream — Gently fold the whipped cream into the cream cheese mixture using a spatula. Use a folding motion – cut down through the center, scrape along the bottom, and lift up. This keeps the mixture light and airy.
- 6Assemble and Chill — Pour the filling over the prepared crust and smooth the top with an offset spatula. Tap the pan gently on the counter to release any air bubbles. Refrigerate for at least 6 hours, preferably overnight, until fully set.
- 7Garnish and Serve — Before serving, run a knife around the edge of the pan and release the springform. Top with orange marmalade or fresh orange slices if desired. Slice with a warm knife for clean edges.

Maya writes about sustainable living and zero-waste practices, focusing on small, actionable changes for everyday life. She shares practical tips on reducing plastic, composting, and mindful consumption, drawn from her own experiments at home.