Every December, my kitchen table disappears under bowls of melted chocolate, tiny dishes of crushed candy canes, and a tangle of pretzel rods waiting to be dressed up. Christmas decorated pretzels are the one holiday project that welcomes every skill level, from a four-year-old wielding a spoon to a grandmother who has been dipping since before I was born. There is something quietly magical about watching a plain, salty pretzel become a gift in under a minute.
Advertisements1
The tradition of gifting sweets at midwinter is older than any of us. In Germany and Austria, bakers have been shaping and glazing holiday biscuits for centuries, and the pretzel itself carries that same heritage, a humble twist of dough once given as a blessing. Dipping it in chocolate and showering it with color is simply the newest chapter of a very old story about sharing sweetness with the people we love.
I have made these on three continents now, in tiny apartment kitchens and in my aunt's sprawling farmhouse, and the recipe never changes because it does not need to. Melt, dip, decorate, rest. What changes is who is standing beside you, sneaking broken pretzel pieces and laughing at lopsided snowmen. That is the real recipe.
Why You'll Love This Recipe
About the Ingredients
24 pretzel rods (about 1 bag, 10 oz / 283g)
Pretzel rods give you a long handle for dipping and decorating; if you only have mini twists, use two forks to dip them instead. Look for rods that are mostly unbroken, since cracks cause chocolate to seep inside and go soggy.
12 oz (340g) good-quality semi-sweet chocolate chips or chopped bars
Semi-sweet balances the salt best; for a sweeter finish use milk chocolate, and for a darker, less sweet result use 60 to 70 percent dark. Chopped bar chocolate melts more smoothly than chips, which contain stabilizers.
6 oz (170g) white chocolate chips or chopped white baking bar
Real white baking chocolate, not white candy melts, tastes far better and sets with a lovely snap; candy melts are the substitute if you need guaranteed bright white color. Melt it gently, since white chocolate scorches faster than dark.
1 cup (about 6 oz / 170g) crushed candy canes or peppermint candies
Crush them in a zip-top bag with a rolling pin for uneven, sparkly shards; pre-crushed peppermint bits from the baking aisle are a fine shortcut. Keep the pieces small so they actually stick to the wet chocolate.
1/2 cup (about 3 oz / 85g) red and green sprinkles, nonpareils, and sanding sugar
Nonpareils give a classic dotted look while sanding sugar adds sparkle; avoid large hard candies that will not adhere. Buy a mixed holiday jar so you get several textures in one purchase.
1/4 cup (30g) finely chopped toasted pecans or almonds (optional)
Toasted nuts add a grown-up crunch; toast them in a dry skillet over medium heat for 3 to 4 minutes until fragrant. If you have a nut allergy in the house, crushed graham crackers or toasted coconut flakes work beautifully instead.
2 tsp coconut oil or vegetable shortening, divided
A small amount of fat thins melted chocolate so it coats evenly and sets with a glossy shine; coconut oil adds a faint flavor while shortening is completely neutral. Do not use butter, which contains water and can cause chocolate to seize.
1/4 tsp flaky sea salt, for finishing
A final pinch of flaky salt on the chocolate makes the sweetness sing; Maldon or any flaky finishing salt is ideal. Skip it if you are using heavily salted pretzels and want a milder result.
Tips & Tricks
Keep Chocolate in the Right Zone
Melt chocolate over barely simmering water or in short microwave bursts, never above 110F (43C), or it will turn grainy and dull instead of glossy.
Work in Small Batches
Dip only four or five pretzels at a time so the chocolate is still tacky when you add sprinkles, otherwise everything slides off.
Let the Excess Drip
Hold each dipped pretzel over the bowl for a full three seconds and give it a gentle tap so you avoid a thick, pooling foot of chocolate at the base.
Plan for Setting Time
Chocolate needs a cool, dry room to firm up; a refrigerator speeds this up but can cause condensation and bloom, so use it only for a quick ten-minute chill.
Pro Tips
Step-by-Step Instructions
1. Line Your Trays
Cover two large baking sheets with parchment paper and set them near your decorating station so finished pretzels have a landing spot. Having everything within arm's reach is the single biggest factor in keeping your chocolate fluid and your sprinkles from clumping.
2. Melt the Dark Chocolate
Place the semi-sweet chocolate and 1 teaspoon of the coconut oil in a heatproof bowl set over a pot of barely simmering water, keeping the water below a simmer so the bowl never gets hotter than 110F (43C). Stir constantly for 4 to 5 minutes until the chocolate is completely smooth and glossy, then remove the bowl from the heat.
3. Dip the Pretzel Rods
Hold a pretzel rod by one end and dip it into the chocolate, tilting the bowl to reach about two-thirds of the way up the rod. Lift it out, let the excess drip back for 3 seconds, and give it one gentle tap against the bowl rim; the coating should look even and slightly translucent at the edges, not thick and heavy.
4. Add the First Toppings
While the chocolate is still wet, immediately roll or sprinkle the coated portion with crushed candy canes, sprinkles, or toasted nuts, working over the parchment so the excess falls onto the tray. The chocolate should look tacky and shiny, which tells you the toppings will grip firmly.
5. Melt and Drizzle the White Chocolate
Melt the white chocolate with the remaining 1 teaspoon coconut oil the same way, stirring for 3 to 4 minutes until silky and pourable. Spoon it into a small zip-top bag, snip a tiny corner, and drizzle thin zigzags over the set dark chocolate for that snowy, finished look.
6. Finish with Flaky Salt
Sprinkle a few flakes of sea salt over the still-wet white chocolate drizzle, then step back and admire the contrast of dark, white, and bright red and green. The salt should catch the light and look like tiny snow crystals.
7. Let Them Set Completely
Leave the pretzels on the parchment at cool room temperature for 25 to 30 minutes, until the chocolate is firm to the touch and releases cleanly from the paper. If your kitchen is warm, chill them for 10 minutes only, then bring them back to room temperature so no condensation forms.
8. Package and Gift
Once fully set, tuck the pretzels into cellophane bags tied with ribbon or stand them upright in a mug for a centerpiece. They are ready to give away the moment the coating is hard, and they look far more impressive than the effort involved.
Delicious Variations
Snowy White Christmas
Dip the rods entirely in white chocolate, then roll them in shredded coconut and silver sanding sugar for a frosty, monochrome look.
S'mores Pretzels
Use milk chocolate and press on mini marshmallows and crushed graham crackers while the coating is wet, then torch the marshmallows lightly for a toasted edge.
Spiced Chai Dark Chocolate
Stir 1/2 teaspoon of cinnamon, a pinch of cardamom, and a pinch of ginger into the melted dark chocolate for a warming, aromatic twist.
How to Store Christmas Decorated Pretzels
Refrigerator
Store in an airtight container in a single layer with parchment between layers for up to 2 weeks; refrigeration keeps them firm but can cause slight bloom, which is harmless.
Freezer
Freeze in a single layer on a tray until solid, then transfer to a freezer bag for up to 2 months; thaw at room temperature in the sealed bag to prevent condensation.
Reheating
No reheating needed; if the chocolate softens in a warm room, simply chill the pretzels for 10 minutes to re-firm the coating before serving.
Frequently Asked Questions
Q: How long do chocolate covered pretzels last?
Stored in an airtight container at cool room temperature, they stay fresh for about 2 weeks, and up to 2 months in the freezer. Humidity is the real enemy, so keep them away from steamy kitchens and refrigerators with condensation.
Q: Why did my chocolate turn white and chalky?
That chalky film is called bloom, and it happens when chocolate is exposed to heat or moisture during melting or storage. It is completely safe to eat, and you can prevent it by melting gently below 110F (43C) and letting the pretzels set in a cool, dry spot.
Q: Can I use candy melts instead of real chocolate?
Yes, candy melts are the easiest substitute because they set hard without tempering and come in vivid colors. They taste waxier than real chocolate, so use them when color and durability matter more than flavor.
Q: How do I keep the pretzels from getting soggy?
Make sure the chocolate coating is fully set before storing, and never seal them in a bag while still warm. A complete, unbroken coating acts as a moisture barrier, so also check that your pretzel rods have no cracks.
Q: Can kids help make these?
Absolutely, this is one of the best kid-friendly holiday projects because there is no oven and no sharp heat involved once the chocolate is melted. Let children handle the dipping and sprinkling while an adult manages the melting, and expect wonderful, uneven results.
Gather your chocolate, your sprinkles, and whoever you love most, and spend an afternoon turning plain pretzels into something worth giving away. These little twists carry more warmth than any store-bought box ever could. Go, see, and connect.
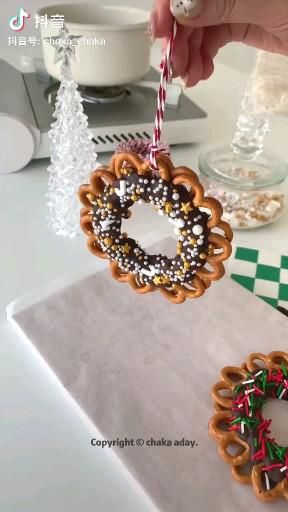
Christmas Decorated Pretzels
Christmas Decorated Pretzels turn salty twists into glossy, sprinkle-covered gifts you can make in one cozy afternoon with kids at the table.
🧂 Ingredients
- 24 pretzel rods (about 1 bag, 10 oz / 283g)
- 12 oz (340g) good-quality semi-sweet chocolate chips or chopped bars
- 6 oz (170g) white chocolate chips or chopped white baking bar
- 1 cup (about 6 oz / 170g) crushed candy canes or peppermint candies
- 1/2 cup (about 3 oz / 85g) red and green sprinkles, nonpareils, and sanding sugar
- 1/4 cup (30g) finely chopped toasted pecans or almonds (optional)
- 2 tsp coconut oil or vegetable shortening, divided
- 1/4 tsp flaky sea salt, for finishing
📋 Instructions
- 1Line Your Trays — Cover two large baking sheets with parchment paper and set them near your decorating station so finished pretzels have a landing spot. Having everything within arm's reach is the single biggest factor in keeping your chocolate fluid and your sprinkles from clumping.
- 2Melt the Dark Chocolate — Place the semi-sweet chocolate and 1 teaspoon of the coconut oil in a heatproof bowl set over a pot of barely simmering water, keeping the water below a simmer so the bowl never gets hotter than 110F (43C). Stir constantly for 4 to 5 minutes until the chocolate is completely smooth and glossy, then remove the bowl from the heat.
- 3Dip the Pretzel Rods — Hold a pretzel rod by one end and dip it into the chocolate, tilting the bowl to reach about two-thirds of the way up the rod. Lift it out, let the excess drip back for 3 seconds, and give it one gentle tap against the bowl rim; the coating should look even and slightly translucent at the edges, not thick and heavy.
- 4Add the First Toppings — While the chocolate is still wet, immediately roll or sprinkle the coated portion with crushed candy canes, sprinkles, or toasted nuts, working over the parchment so the excess falls onto the tray. The chocolate should look tacky and shiny, which tells you the toppings will grip firmly.
- 5Melt and Drizzle the White Chocolate — Melt the white chocolate with the remaining 1 teaspoon coconut oil the same way, stirring for 3 to 4 minutes until silky and pourable. Spoon it into a small zip-top bag, snip a tiny corner, and drizzle thin zigzags over the set dark chocolate for that snowy, finished look.
- 6Finish with Flaky Salt — Sprinkle a few flakes of sea salt over the still-wet white chocolate drizzle, then step back and admire the contrast of dark, white, and bright red and green. The salt should catch the light and look like tiny snow crystals.
- 7Let Them Set Completely — Leave the pretzels on the parchment at cool room temperature for 25 to 30 minutes, until the chocolate is firm to the touch and releases cleanly from the paper. If your kitchen is warm, chill them for 10 minutes only, then bring them back to room temperature so no condensation forms.
- 8Package and Gift — Once fully set, tuck the pretzels into cellophane bags tied with ribbon or stand them upright in a mug for a centerpiece. They are ready to give away the moment the coating is hard, and they look far more impressive than the effort involved.

Aisha writes about travel and cultural immersion, sharing stories and tips from her journeys to off-the-beaten-path destinations. She emphasizes respectful tourism, budget-friendly adventures, and the importance of connecting with local communities.