I burned my first batch of these pumpkin treats so badly that my smoke alarm applauded me. I had cranked the oven to 400F because I was impatient and hungry, and what came out looked less like dessert and more like hockey pucks with a tan. My abuela took one bite, set it down gently, and said, 'Mija, the pumpkin deserves better.' She was right.
Advertisements1
So I went back and did it properly – real pumpkin puree, a gentle 350F oven, and just enough spice to make the whole house smell like a candle you'd actually pay for. These Rustic Pumpkin Treats are soft in the middle, barely crisp at the edges, and sturdy enough to survive a lunchbox or a potluck.
They're the kind of bake that forgives you. No piping bags, no perfect squares, no fuss. Just a bowl, a spoon, and about 50 minutes of your afternoon.
Why You'll Love This Recipe
About the Ingredients
2 cups (250g) all-purpose flour
Spoon it into the cup and level it off – scooping straight from the bag packs in too much flour and makes dry treats. Swap in white whole wheat flour 1-for-1 if you want a little extra fiber.
1 1/2 teaspoons baking powder
Check the date on your can – baking powder loses punch after about a year. If you only have baking soda, use 3/4 teaspoon plus 1 teaspoon of lemon juice.
1 teaspoon ground cinnamon
Fresh cinnamon smells sweet and woody when you open the jar; if it smells like dust, it's done. Cinnamon sticks ground in a coffee grinder are a huge upgrade here.
1/2 teaspoon ground nutmeg
Buy whole nutmeg and grate it on a microplane – pre-ground nutmeg fades fast. If you're out, pumpkin pie spice works as a straight swap.
1/2 teaspoon fine salt
Fine sea salt dissolves evenly; kosher salt works too but use a slightly heaped half teaspoon. Don't skip it – it's what keeps these from tasting flat.
1 cup (200g) packed light brown sugar
Press it firmly into the measuring cup for an accurate scoop. Dark brown sugar gives a deeper molasses flavor, and coconut sugar works if you want a less sweet version.
1 cup (240g) canned pumpkin puree
Make sure the label says 100% pumpkin, NOT pumpkin pie filling – the filling is pre-sweetened and spiced. If you roast your own sugar pumpkin, drain it well first.
2 large eggs, room temperature
Room temp eggs emulsify better, so pull them out 20 minutes ahead. Out of eggs? Use 1/2 cup unsweetened applesauce instead.
1/2 cup (120ml) neutral oil, such as canola or grapeseed
Oil keeps these moist far longer than butter. Melted coconut oil works too, but let it cool slightly so it doesn't cook the eggs.
1 teaspoon vanilla extract
Real vanilla, not imitation, if you can swing it. Bourbon vanilla adds a lovely warmth that pairs with the pumpkin.
1/2 cup (60g) chopped pecans or walnuts, optional
Toast them for 5 minutes first – it doubles the flavor. Skip entirely or use mini chocolate chips if nuts aren't your thing.
Tips & Tricks
Don't Overmix the Batter
Stir just until the flour disappears – overmixing develops gluten and turns soft treats tough and rubbery.
Blot Your Pumpkin
Canned pumpkin varies in water content; if yours looks watery, blot it with a paper towel so the batter isn't soupy.
Cool Before Storing
Let them cool completely on the rack before sealing them up, or trapped steam makes the tops gummy.
Measure Flour Correctly
Spoon and level, every time. This is the number one reason home-baked pumpkin treats come out dry.
Pro Tips
Step-by-Step Instructions
1. Heat the Oven
Preheat your oven to 350F (175C) and line two baking sheets with parchment paper. A hot, even oven is the difference between golden edges and pale, sad centers.
2. Whisk the Dry Team
In a large bowl, whisk together the flour, baking powder, cinnamon, nutmeg, and salt until no streaks remain. Breaking up any lumps now means no surprise pockets of spice later.
3. Blend the Wet Team
In a second bowl, whisk the brown sugar, pumpkin puree, eggs, oil, and vanilla until glossy and smooth, about 1 minute. It should look like thick, shiny pudding.
4. Bring It Together
Pour the wet mixture into the dry and fold gently with a spatula just until the flour vanishes, then stir in the nuts. Stop the second it comes together – lumps are fine, tough treats are not.
5. Scoop and Shape
Drop rounded 2-tablespoon mounds onto the prepared sheets, spacing them 2 inches apart. Wet your fingers and lightly flatten each one to about 3/4 inch thick for even baking.
6. Bake Until Golden
Bake at 350F (175C) for 14 to 16 minutes, until the edges are set and lightly golden and the centers spring back when touched. If you have an instant-read thermometer, the middle should read 200F to 205F (93C to 96C).
7. Cool on the Sheet
Let them rest on the baking sheet for 5 minutes, then move to a wire rack to cool completely. They firm up as they cool, so don't panic if they feel soft straight from the oven.
8. Finish and Serve
Dust with powdered sugar or drizzle with maple glaze if you like, then serve warm with coffee or cold milk. Watch them disappear before you've even cleaned the bowl.
Delicious Variations
Chocolate Chip Pumpkin Treats
Fold in 3/4 cup mini chocolate chips and cut the nutmeg to 1/4 teaspoon for a crowd-pleasing mashup.
Maple Pecan Version
Replace the brown sugar with 3/4 cup maple syrup, reduce the oil to 1/3 cup, and top each with a toasted pecan half.
Gluten-Free Pumpkin Bites
Swap the all-purpose flour for a 1-to-1 gluten-free baking blend and add 1/4 teaspoon xanthan gum if your blend doesn't include it.
How to Store Rustic Pumpkin Treats
Refrigerator
Store in an airtight container at room temperature for up to 3 days, or in the fridge for up to 1 week – bring to room temp before eating for the best texture.
Freezer
Freeze cooled treats in a zip-top bag with parchment between layers for up to 3 months; thaw overnight in the fridge or on the counter for 1 hour.
Reheating
Warm in a 300F (150C) oven for 5 to 7 minutes, or microwave a single treat for 15 seconds – just until steamy, not hot, so they stay soft.
Frequently Asked Questions
Q: Can I use fresh pumpkin instead of canned?
Yes, but you need to cook and drain it first or your batter will be too wet. Roast or steam the pumpkin, mash it, then press it in a fine-mesh strainer for 20 minutes before measuring – you'll need about 1 cup of drained puree.
Q: Why are my pumpkin treats dry and dense?
Almost always too much flour or overmixing. Spoon and level your flour instead of scooping, and fold the batter only until the flour just disappears – a few lumps are perfectly fine.
Q: How do I know when they're done baking?
The edges should be set and lightly golden and the centers should spring back when you press them gently. A toothpick in the center should come out with a few moist crumbs, and an instant-read thermometer should read 200F to 205F (93C to 96C).
Q: Can I make these pumpkin treats ahead of time?
Absolutely – they actually taste better the next day as the spices settle. Bake them up to 3 days ahead, store airtight at room temperature, or freeze for up to 3 months and thaw as needed.
Q: Are these pumpkin treats healthy?
They're a treat, not a health food, but real pumpkin brings vitamin A and fiber to the party. Each one lands around 285 calories, so they fit comfortably into a balanced day.
If you bake these Rustic Pumpkin Treats, I want to hear about it – tell me in the comments whether you went chocolate chip or pecan, and tag me in your photos so I can cheer you on. And if your first batch looks a little lopsided, that's the rustic part doing its job. You're doing better than you think.
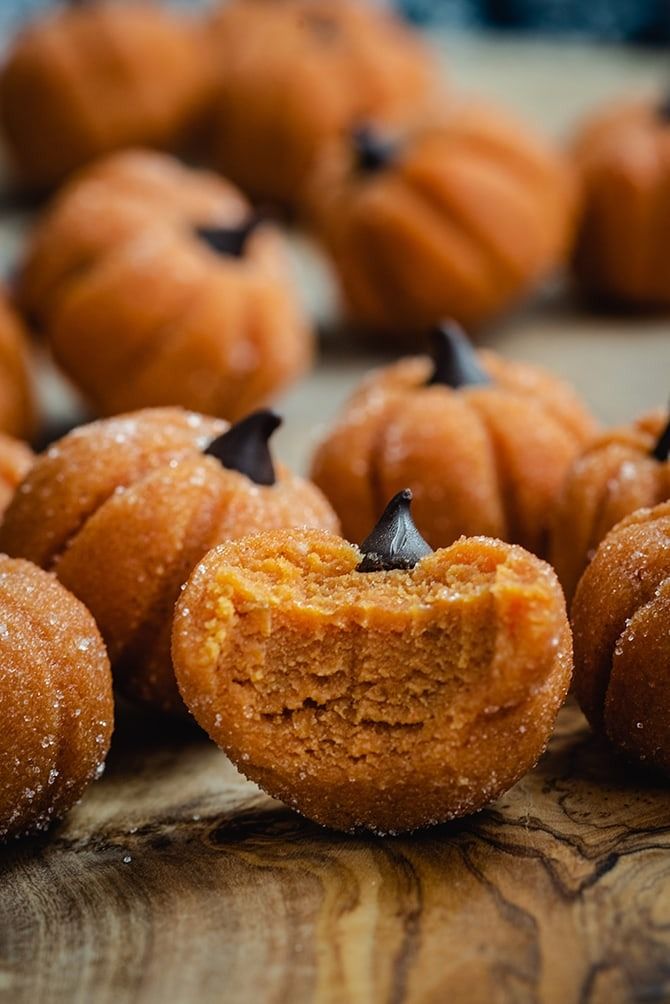
Rustic Pumpkin Treats
Rustic Pumpkin Treats bake up soft, spiced, and golden in 50 minutes with real pumpkin and warm cinnamon – the easy fall dessert your kitchen deserves.
🧂 Ingredients
- 2 cups (250g) all-purpose flour
- 1 1/2 teaspoons baking powder
- 1 teaspoon ground cinnamon
- 1/2 teaspoon ground nutmeg
- 1/2 teaspoon fine salt
- 1 cup (200g) packed light brown sugar
- 1 cup (240g) canned pumpkin puree
- 2 large eggs, room temperature
- 1/2 cup (120ml) neutral oil, such as canola or grapeseed
- 1 teaspoon vanilla extract
- 1/2 cup (60g) chopped pecans or walnuts, optional
📋 Instructions
- 1Heat the Oven — Preheat your oven to 350F (175C) and line two baking sheets with parchment paper. A hot, even oven is the difference between golden edges and pale, sad centers.
- 2Whisk the Dry Team — In a large bowl, whisk together the flour, baking powder, cinnamon, nutmeg, and salt until no streaks remain. Breaking up any lumps now means no surprise pockets of spice later.
- 3Blend the Wet Team — In a second bowl, whisk the brown sugar, pumpkin puree, eggs, oil, and vanilla until glossy and smooth, about 1 minute. It should look like thick, shiny pudding.
- 4Bring It Together — Pour the wet mixture into the dry and fold gently with a spatula just until the flour vanishes, then stir in the nuts. Stop the second it comes together – lumps are fine, tough treats are not.
- 5Scoop and Shape — Drop rounded 2-tablespoon mounds onto the prepared sheets, spacing them 2 inches apart. Wet your fingers and lightly flatten each one to about 3/4 inch thick for even baking.
- 6Bake Until Golden — Bake at 350F (175C) for 14 to 16 minutes, until the edges are set and lightly golden and the centers spring back when touched. If you have an instant-read thermometer, the middle should read 200F to 205F (93C to 96C).
- 7Cool on the Sheet — Let them rest on the baking sheet for 5 minutes, then move to a wire rack to cool completely. They firm up as they cool, so don't panic if they feel soft straight from the oven.
- 8Finish and Serve — Dust with powdered sugar or drizzle with maple glaze if you like, then serve warm with coffee or cold milk. Watch them disappear before you've even cleaned the bowl.

Sofia writes about parenting and family wellness, exploring the messy, joyful reality of raising kids. She offers relatable stories and practical advice on everything from sleep training to managing screen time, always with a dose of humor.